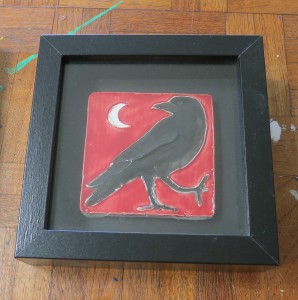
 Here’s a ribba shadowbox, which I bought from Ikea years ago and used to frame this small tile. Unfortunately, they discontinued this model.
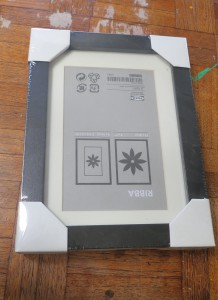 Here’s what they carry now. They’re very cheap frames. The smallest was only $1.99 yesterday. Not a bad size for people who want to do small multi-media projects and want a self-contained environment for them.
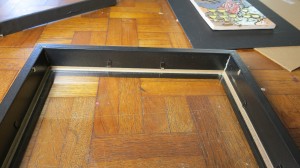 Disassemble the frame by bending the flaps back and removing the mat and back board, as well as the grey paper that Ikea uses to tell you what the frame’s name is. “Hello, Ribba, my name is Kater.”
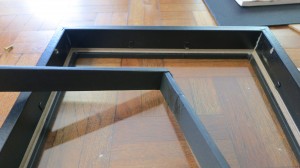 Measure the width, heigh, and depth of the frame. Don’t fret if the depth is a little off. You’re going to make an insert. For this insert, I used foam core which had been painted on both sides with acrylic medium. After the medium dried, I cut it out, then wrapped each piece in black paper, gluing it down with white glue. I glued the corners together as well. It’s pretty solid; the paper makes the glue take very well.
 Here’s the insert frame set into place. Since I bent the flaps back as far as they would go, the frame holds in pretty snugly. Because it’s black, the same color as the frame, you can’t really tell it’s there.
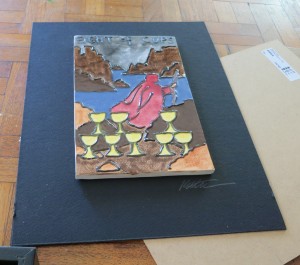 Here’s what I framed. This is one of my tiles, glued onto a black mat-board background. I even signed it.
 I set my mat into the frame. It rests on top of the foamcore insert. After this, I add the backing that came with the frame.
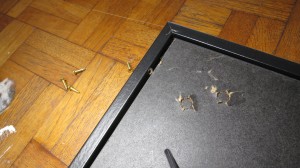 Here’s how you’re going to hold the backing on, since the metal flaps are in the wrong place. Drill tiny pilot holes for your tiny screws. These screws are about 1cm long. If you don’t want to use the metal flange to hang it with, you can also drill tiny holes and screw in loops to use with a wire.
 Here’s my tile, all framed. Okay, and also, a reflection of my hand and the camera. Anti-glare glass? If I could afford that, why would I be buying frames at Ikea?
Hope this helps!

1 comments
Incredible points. Great arguments. Keep up the amazing work.